Installation
Installation
Once you have chosen your preferred design and submitted the consultation form, we will contact you to schedule an appointment. Our team will visit your property to accurately mark the location for your new mailbox. Installations are conducted year-round, weather permitting, following the clearance from DigSafe to ensure safe digging conditions.
Each standard installation is priced at $200 and takes approximately 2-4 hours to complete. However, unforeseen conditions encountered during the process, such as frozen ground, underground cement, or obstructions, may increase the scope of work. If additional work is necessary and mutually agreed upon, the price may be adjusted accordingly.
For everyone’s safety, we kindly ask that our customers maintain a minimum distance of 10 feet from the active work area until the installation is completed.

Step 1 : Remove Old Mailbox

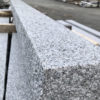
Step 2 – Install and Level Granite Post

Step 3 – Attach Bracket with Stainless Steel Anchor Pins

Step 4 – Install AZEK Board

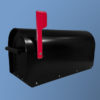
Step 5 – Secure New Mailbox

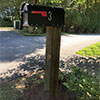
Step 6 – Add Numbers and Touch Up Landscaping
You should check out our payment policies so you know what to expect from the pros at Superior Mailbox Design, Inc.
Superior Mailbox Design Inc.
190 Main Street,
North Reading, MA 01864
(781) 315-1190
superiormailbox@icloud.com